Setting Up a Simple Python Project with PyCharm and GitHub
Starting a Python project on the right foot makes everything easier in the long run. It’s worth taking a moment to get your folders in order, keep your code, tests, and documentation separate so things don’t turn into a mess later. A virtual environment is a must; it keeps your dependencies under control and avoids unwanted surprises. Set up Git from the beginning, and push the project to GitHub if you plan to collaborate or just want a backup in the cloud. If you’re using an IDE like PyCharm, it can help tie everything together nicely. This guide is meant for smaller projects, nothing too heavy, just a solid, clean foundation to build on.
Pre-requisites
Download and install Python.
Download and install PyCharm.
Create an account on GitHub
Download and install Git
Configure Git based on your credentials from GitHub (do this in the command window)
git config --global user.name "Your Name"
git config --global user.email "your.email@example.com"
Connecting PyCharm to GitHub
I always create the repository on GitHub first, then clone it locally. Here’s how:
Create the GitHub repository:
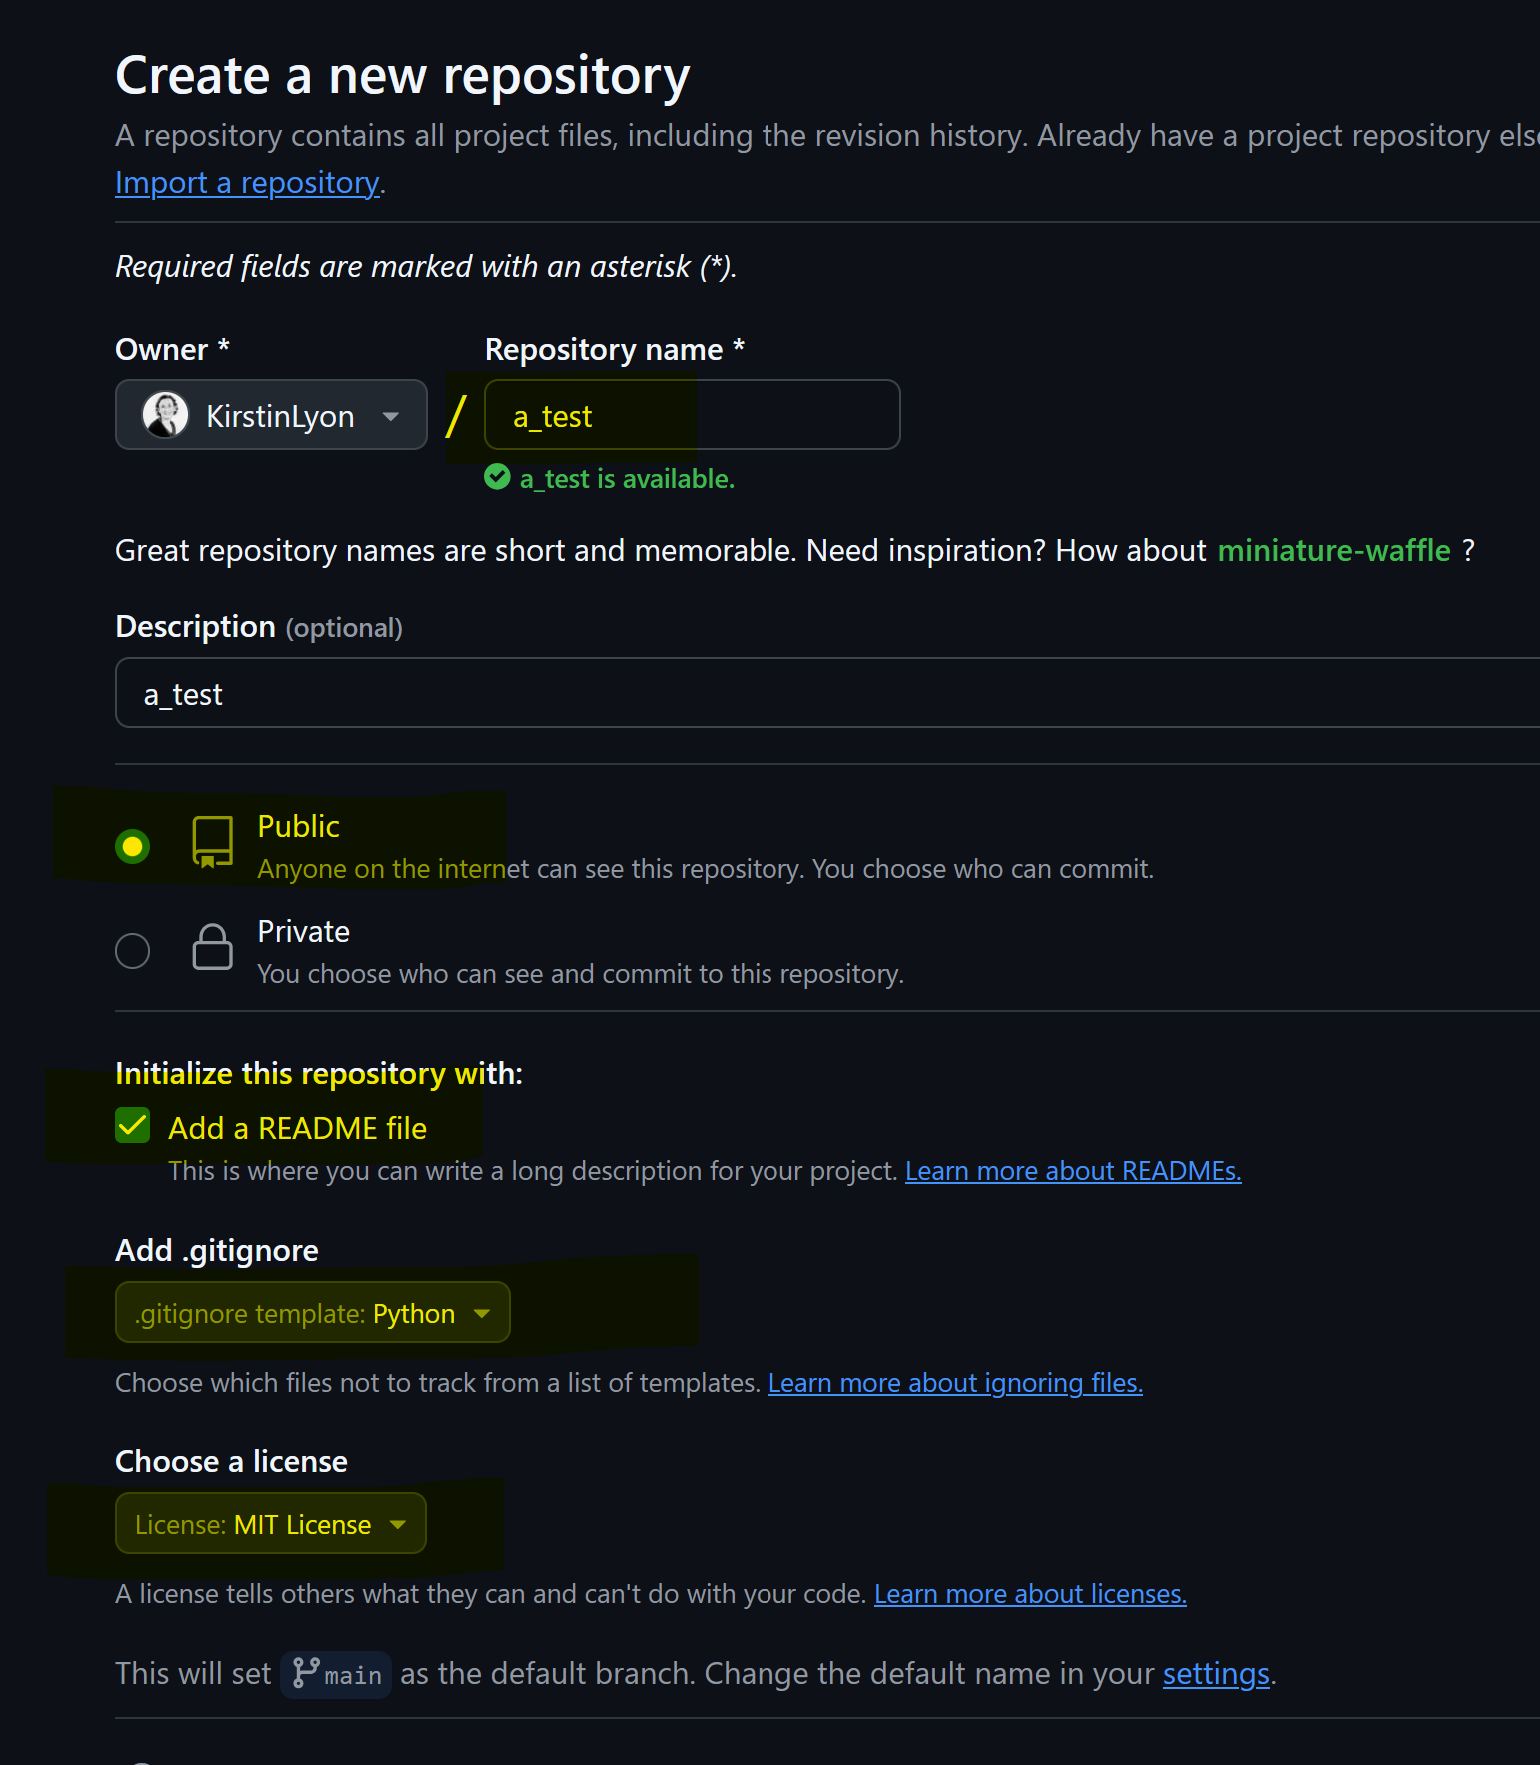
- Log in to your GitHub account and create a new repository.
- Important: Add the .gitignore, README.md, and LICENSE files during setup. GitHub provides templates for these-choose one that fits your project (you can edit it later).
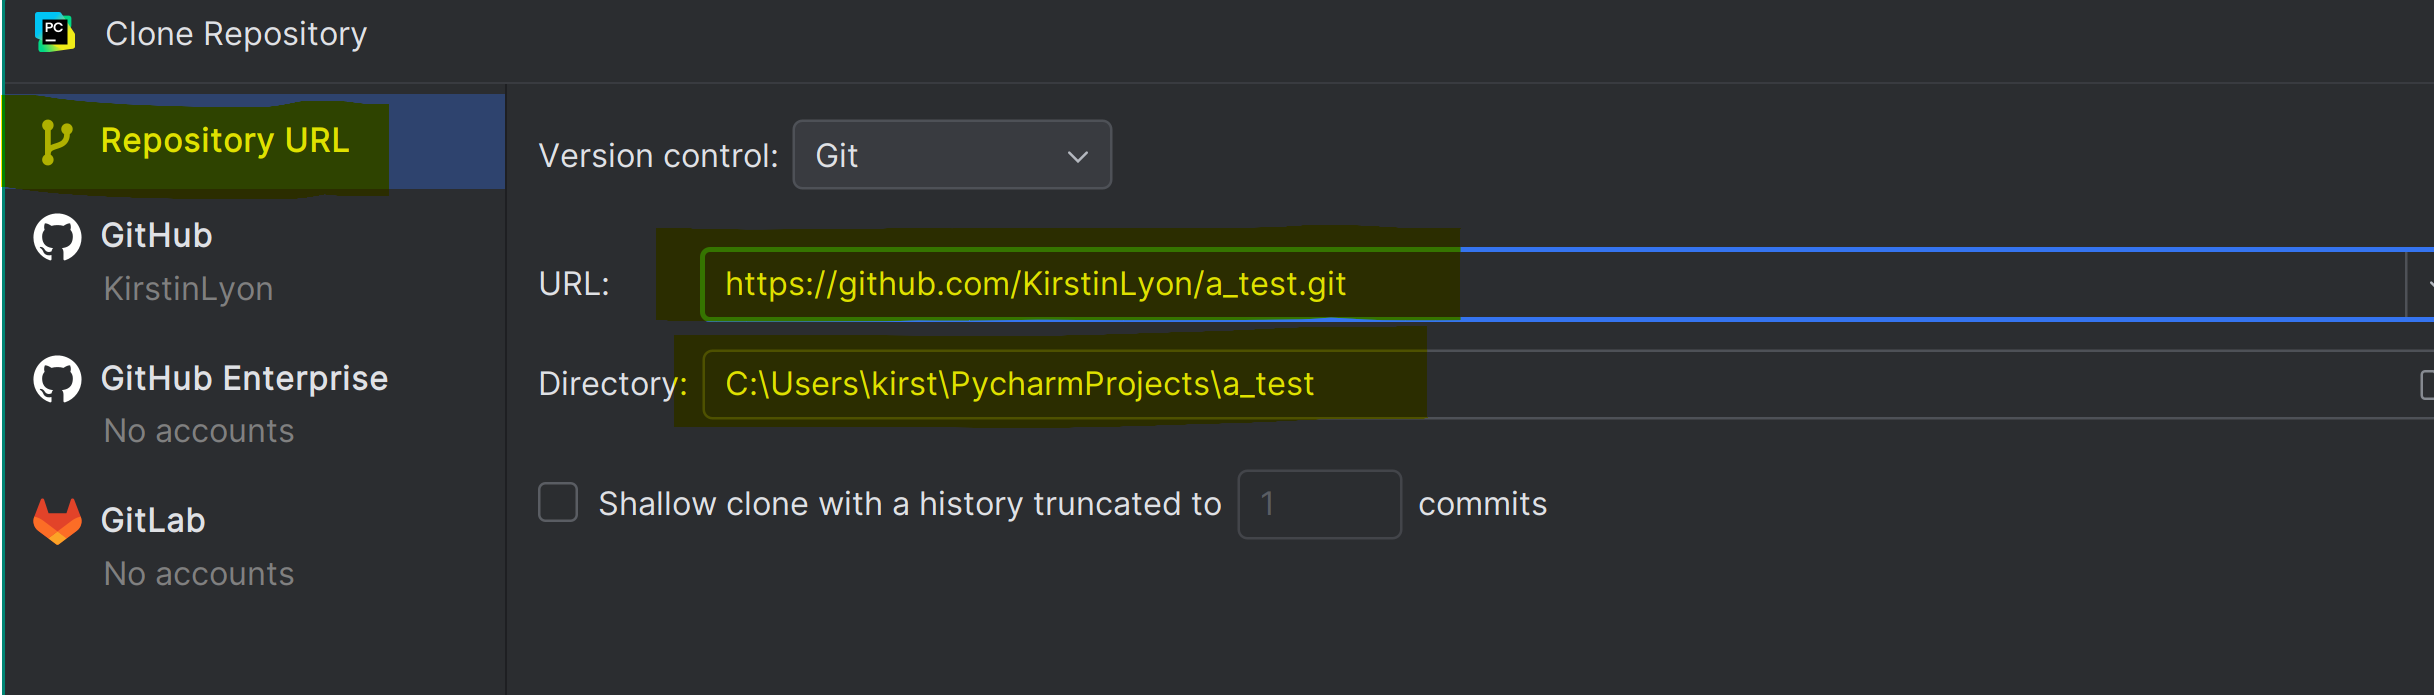
You can find the repository URL here once created:

Clone in PyCharm:
- Go to File → Project from Version Control. -Paste the GitHub repository URL and select where to save your repository in your local directory.
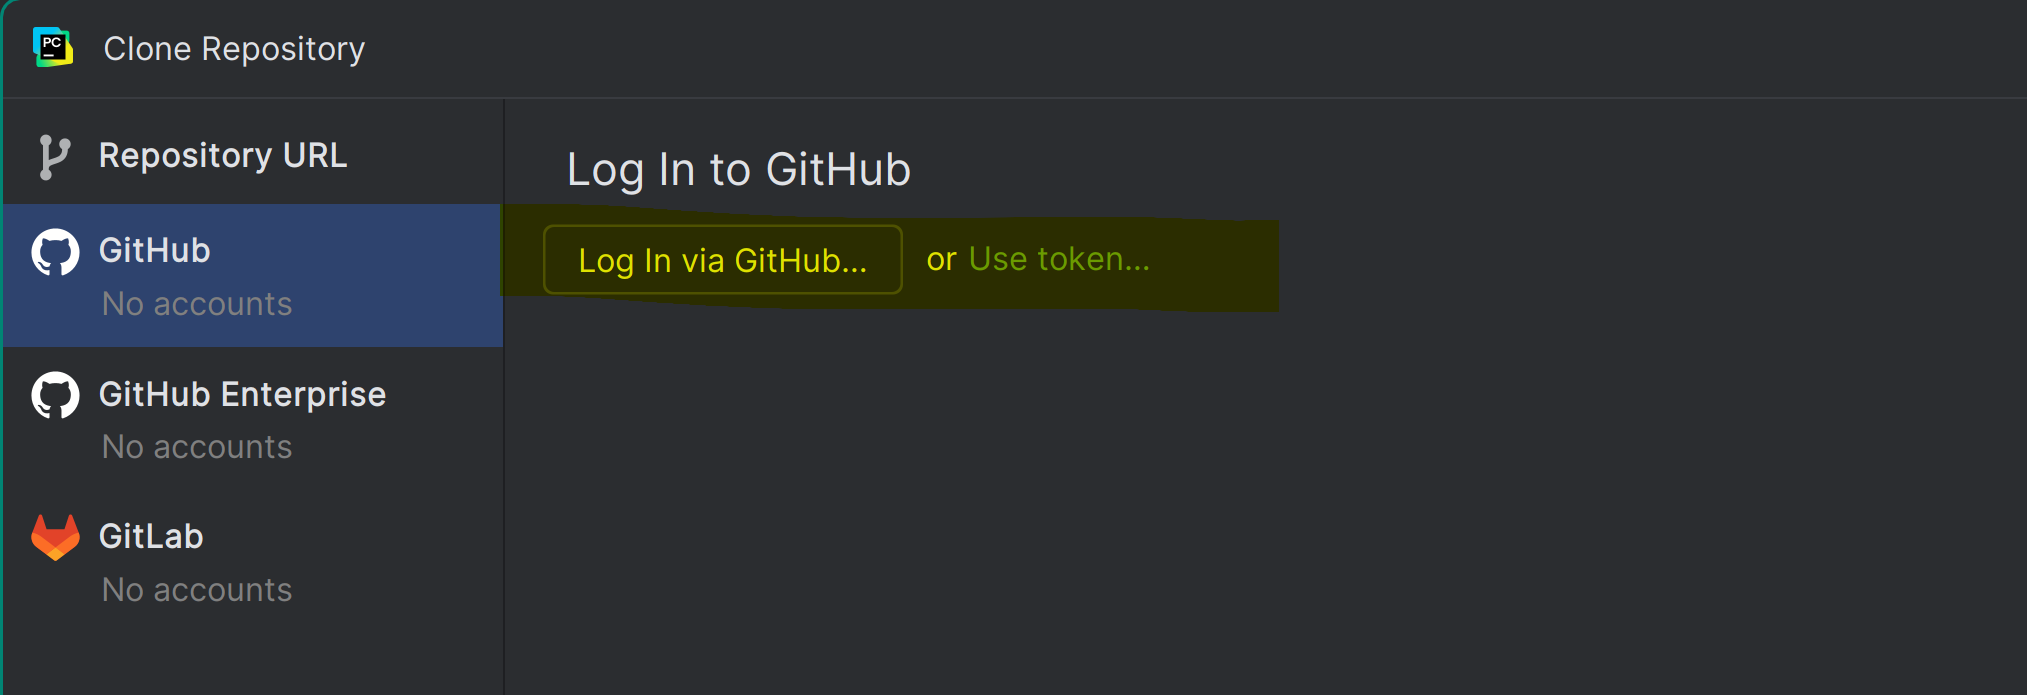
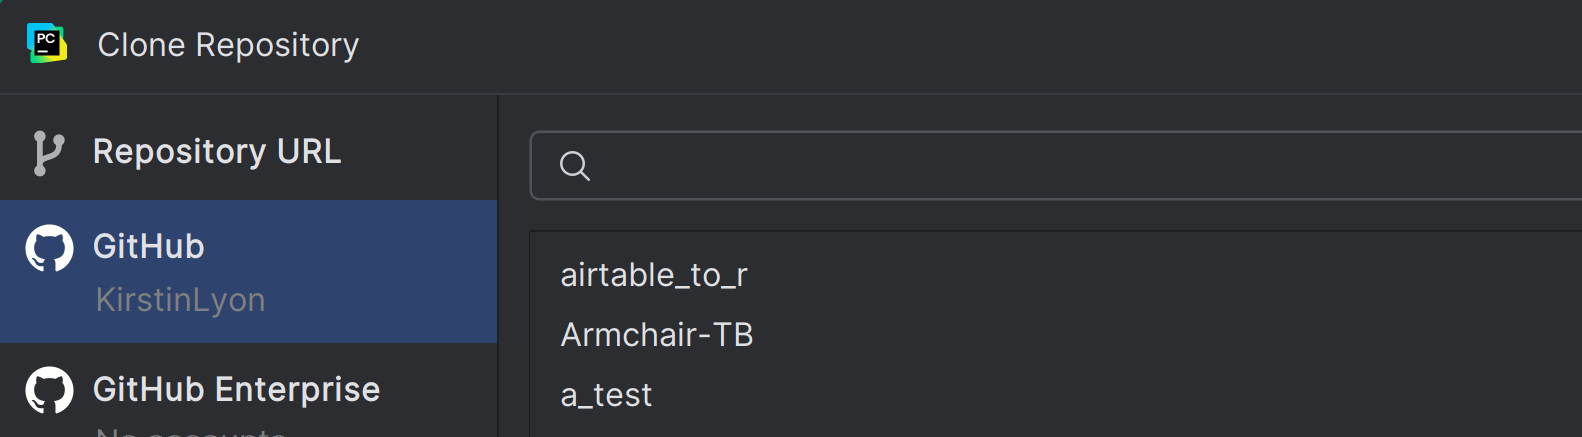
Select the repository you want to clone from GitHub (sign in if you haven’t logged on):
If not logged on:
if logged on:
Set up your Python virtual environment
Python projects require virtual environments for dependency management. While PyCharm creates them automatically for new projects, cloned repositories need manual setup:
Open a terminal window and create an environment:

Create a virtual environment:
python -m venv .venv
Activate it:
.venv\Scripts\activate
PyCharm will detect and use this environment. The approach of using the command line to create a virtual environment works consistently across all platforms.
After the virtual environment is created, PyCharm creates an .idea folder. The .idea folder is crucial for maintaining the state and configuration of your project within PyCharm. It is generally recommended to add this folder to your .gitignore file if you are using Git, as these settings are typically user-specific and may not be relevant to other developers working on the same project.
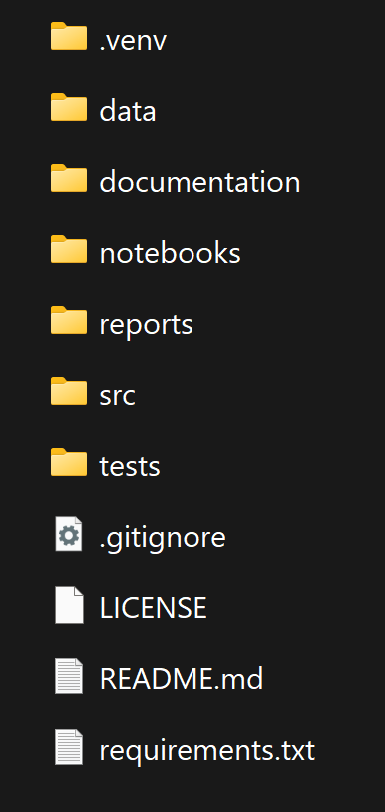
Create the project structure and files
Start by creating your core folder structure. For small data projects, I recommend separating directories for different purposes:
- data/: Contains all the data, divided into raw and processed.
- src/: For scripts that are in production.
- notebooks/: Contains Jupyter files, which are more experimental.
- reports/: Contains any reports or visualizations generated from the scripts.
- tests/: For test scripts.
- documentation/: For any documentation files related to the project.
When creating your GitHub repository, let GitHub generate your initial README.md, .gitignore and License files.
Your project directory will look something like this:
Remember to update your .gitignore file to exclude any unnecessary or restricted files or directories (e.g. data).
Maintaining project dependencies
For Python dependencies, create a requirements.txt file listing all required packages. This makes environment reproduction straightforward for collaborators. This file should be placed in the main project directory.
Always verify that your requirements.txt file contains all necessary packages. A properly maintained file specifies exact versions, like this example:
# Data wrangling
pandas>=2.2.3
numpy>=1.26.0

# Jupyter (if exploring/interacting during dev)
notebook>=7.0.0
To set up all required packages, run this command in your terminal:
pip install -r requirements.txt
This will install every package listed in your requirements file with their specified versions. Make sure you have activated your virtual environment first to keep the installation project-specific.
Specifying versions this way ensures consistent behaviour across different setups. Remember to update the file whenever you add new dependencies to your project. You can update the requirements.txt file by using the following command in your terminal:
pip freeze > requirements.txt
Update GitHub
You have two ways to handle version control in PyCharm:
For terminal commands, use these essential Git operations:
git pull origin [branch-name]     # Pull the current version
git add .                         # Stages all changed files OR
git add [filename]                # Stages specific files only
git commit -m "Descriptive note"  # Commits with a clear message
git push origin [branch-name]     # Pushes to your remote branch
Alternatively, use PyCharm’s Git interface:
First, pull the latest changes (Git → Pull) Then commit and push through the GUI (Git → Commit → Push)
Both methods accomplish the same goal, keeping your local and remote repositories synchronised. The terminal gives you precise control, while the GUI provides a visual workflow.
Time to start coding!