Automating R Scripts to Fetch and Process API Data with GitHub Actions
This post shows how to automatically retrieve a random indicator from the World Health Organization (WHO) API every midnight using R and GitHub Actions. This example illustrates the workflow’s steps, including setting up the environment, installing necessary dependencies, and executing the R script to fetch and process the data.
Create a repository in GitHub and connect it to RStudio (or your IDE of choice).
There are many descriptions of how to do that. One resource I used was happygitwithr.com
Extract a Sample Indicator from WHO API (R Script Walkthrough)
Set up the environment and set the URL base.
# LOAD LIBRARIES -------------------------------------------------------------
library(httr)
library(jsonlite)
library(dplyr)
library(janitor)
library(tidyr)
library(purrr)
library(glue)
library(readr)


# GLOBAL VARIABLES -----------------------------------------------------------
URL_BASE <-  "https://ghoapi.azureedge.net/api/"
This function converts JSON data to a tibble, a format that is easier to work with in R. It is helpful for this project as it simplifies the process of pulling data from the API.
convert_JSON_to_tbl <- function(url){
    data <- GET(url)
    data_df <- fromJSON(content(data, as = "text", encoding = "utf-8"))
    data_tbl <-  map_if(data_df, is.data.frame, list) |>
        as_tibble() |>
        unnest(cols = c(value)) |>
        select(-'@odata.context')
    return(data_tbl)
}
This function selects a random indicator from the API and checks if it contains data. If no data is found, it selects another random indicator, repeating the process until a valid indicator with data is identified. This ensures that only meaningful indicators are used, streamlining the data retrieval and maintaining data quality.
find_indicator <- function(all_indicators, URL_BASE) {
    temp <- tibble()  # Initialize as an empty tibble

    #keep looking for a new indicator if you find one that is empty
    while (nrow(temp) == 0) {
        # Select a random indicator
        random_indicator <- all_indicators |>
            sample_n(1) |>
            select(IndicatorCode) |>
            pull()

        # Fetch data for the selected indicator
        temp <- convert_JSON_to_tbl(paste0(URL_BASE,random_indicator))
    }

    return(temp)
}
Creates tibbles for all data — this will be combined with the indicator dataset later.
all_dimension <-  convert_JSON_to_tbl("https://ghoapi.azureedge.net/api/Dimension")
all_spatial <-  convert_JSON_to_tbl(paste0(URL_BASE,"Dimension/COUNTRY/DimensionValues"))
all_indicators <-  convert_JSON_to_tbl(paste0(URL_BASE,"Indicator"))
Download an indicator dataset. The dataset should have values, some of which are not numeric. It should also be at a country and year level. If the indicator doesn’t meet those requirements, another indicator is selected.
data <- tibble()

while(nrow(data) == 0) {
    data <- find_indicator(all_indicators, URL_BASE) |>
        clean_names() |>
        filter(!is.na(numeric_value)) |>
        filter(spatial_dim_type == "COUNTRY") |>
        filter(time_dim_type == "YEAR")

}
Create the final dataset and write it to the Dataout directory.
# PREPARE DATA ----------------------------------------------------------------

#all countries
all_countries <- all_spatial |>
    select(Code, Title) |>
    rename(spatial_dim = Code, country = Title)

#create final dataset
data_final <- data |>
    left_join(all_countries, by = "spatial_dim") |>
    left_join(all_indicators, by = c("indicator_code" = "IndicatorCode") ) |>
    left_join(all_dimension, by = c("dim1type" = "Code")) |>
    clean_names() |>
    rename(
           year = time_dim,
           iso_code = spatial_dim,
           region_code = parent_location_code,
           region = parent_location
           )

# SAVE DATA  ------------------------------------------------------
write_csv(data_final, "Dataout/who_data.csv")
Setting Up GitHub Actions
GitHub Actions helps automate workflows directly within your GitHub repositories. This script runs an R script and stores data in a Dataout folder on GitHub.
The first step is to create a Personal Access Token (PAT). Using a PAT in GitHub Actions makes automating workflows safer and more efficient. PATs let you log in securely without sharing your primary password and allow you to set specific permissions so that only necessary actions are permitted. This is great for CI/CD pipelines where scripts must interact with your repositories. PATs help keep your automation secure and under control.
- Create your Personal Access Token in your Profile
Navigate to Settings: Go to the settings section of your GitHub profile, not an individual repository.
Access Developer Settings: Click on “Developer Settings.”
Personal Access Tokens: Select “Personal Access Tokens” and then “Tokens (classic).”
Generate New Token: Click “Generate new token” to create a new token (classic).
Configure Token Settings:
- Note: Enter a name for the token.
- Expiration: Set an expiration date for the token.
- Scopes: Select the necessary scopes. For this project, choose “repo” and “workflows.”
Generate Token: Click “Generate token.”
Copy the Token: The token will be displayed only once. Copy it, as you will need it for the next steps.
2. Set up secrets in your repository
Navigate to your repository
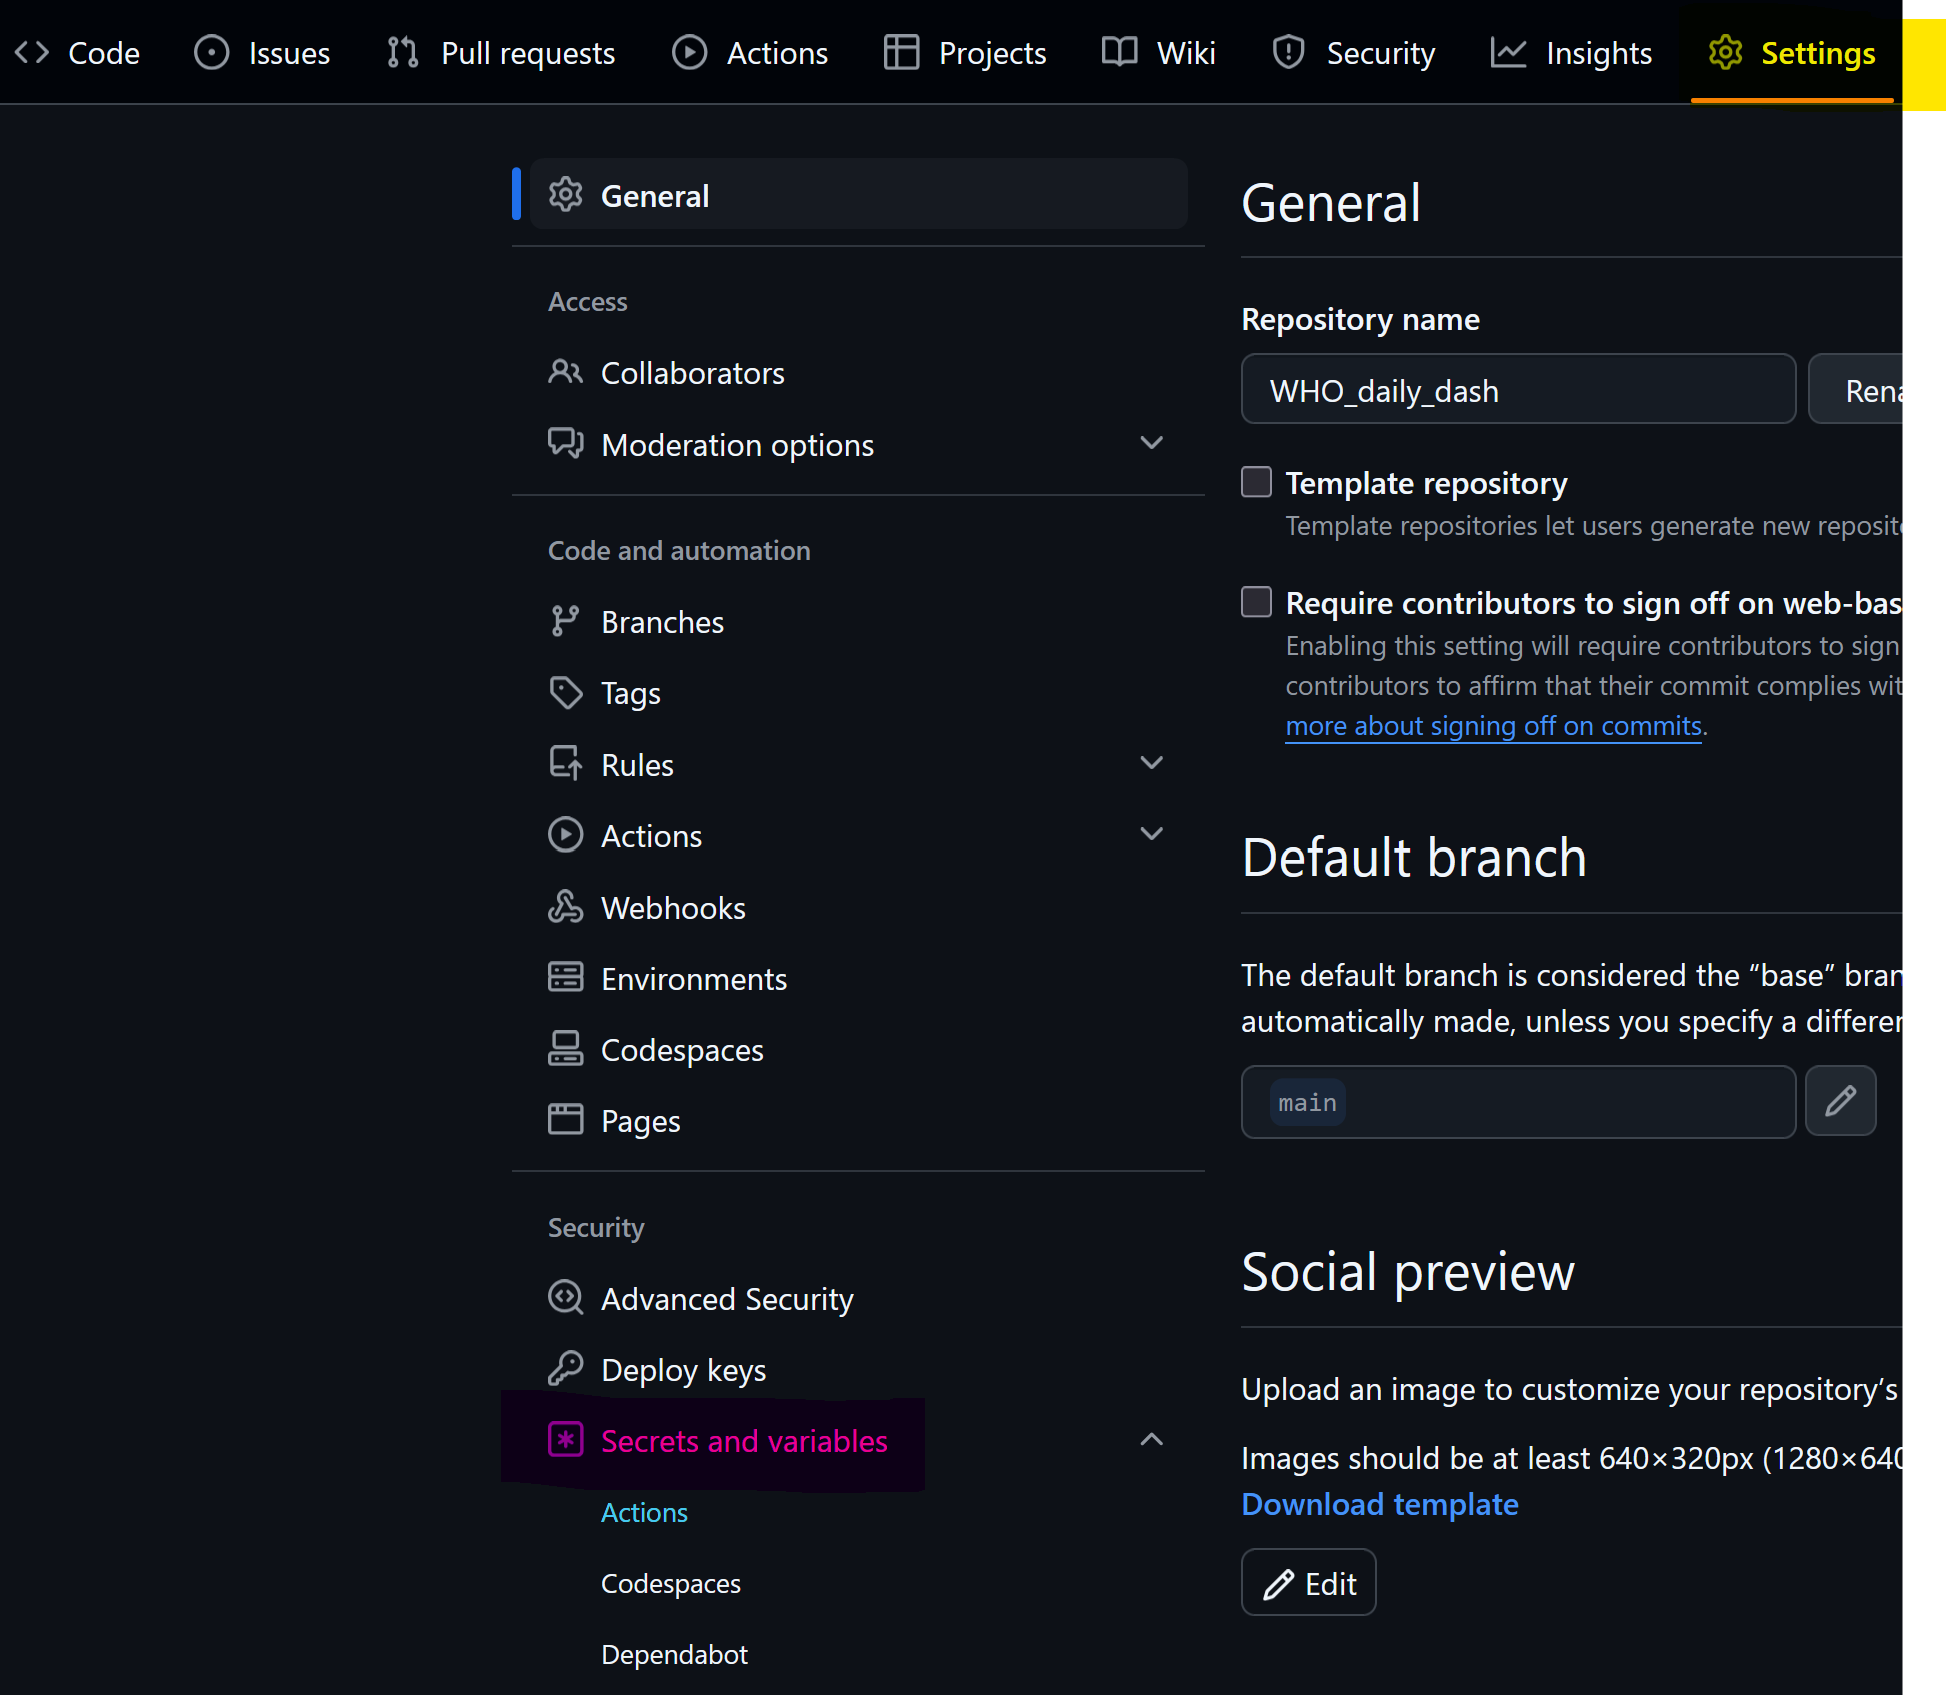
Go to settings (yellow) -> secrets and variables (pink) -> actions (blue)
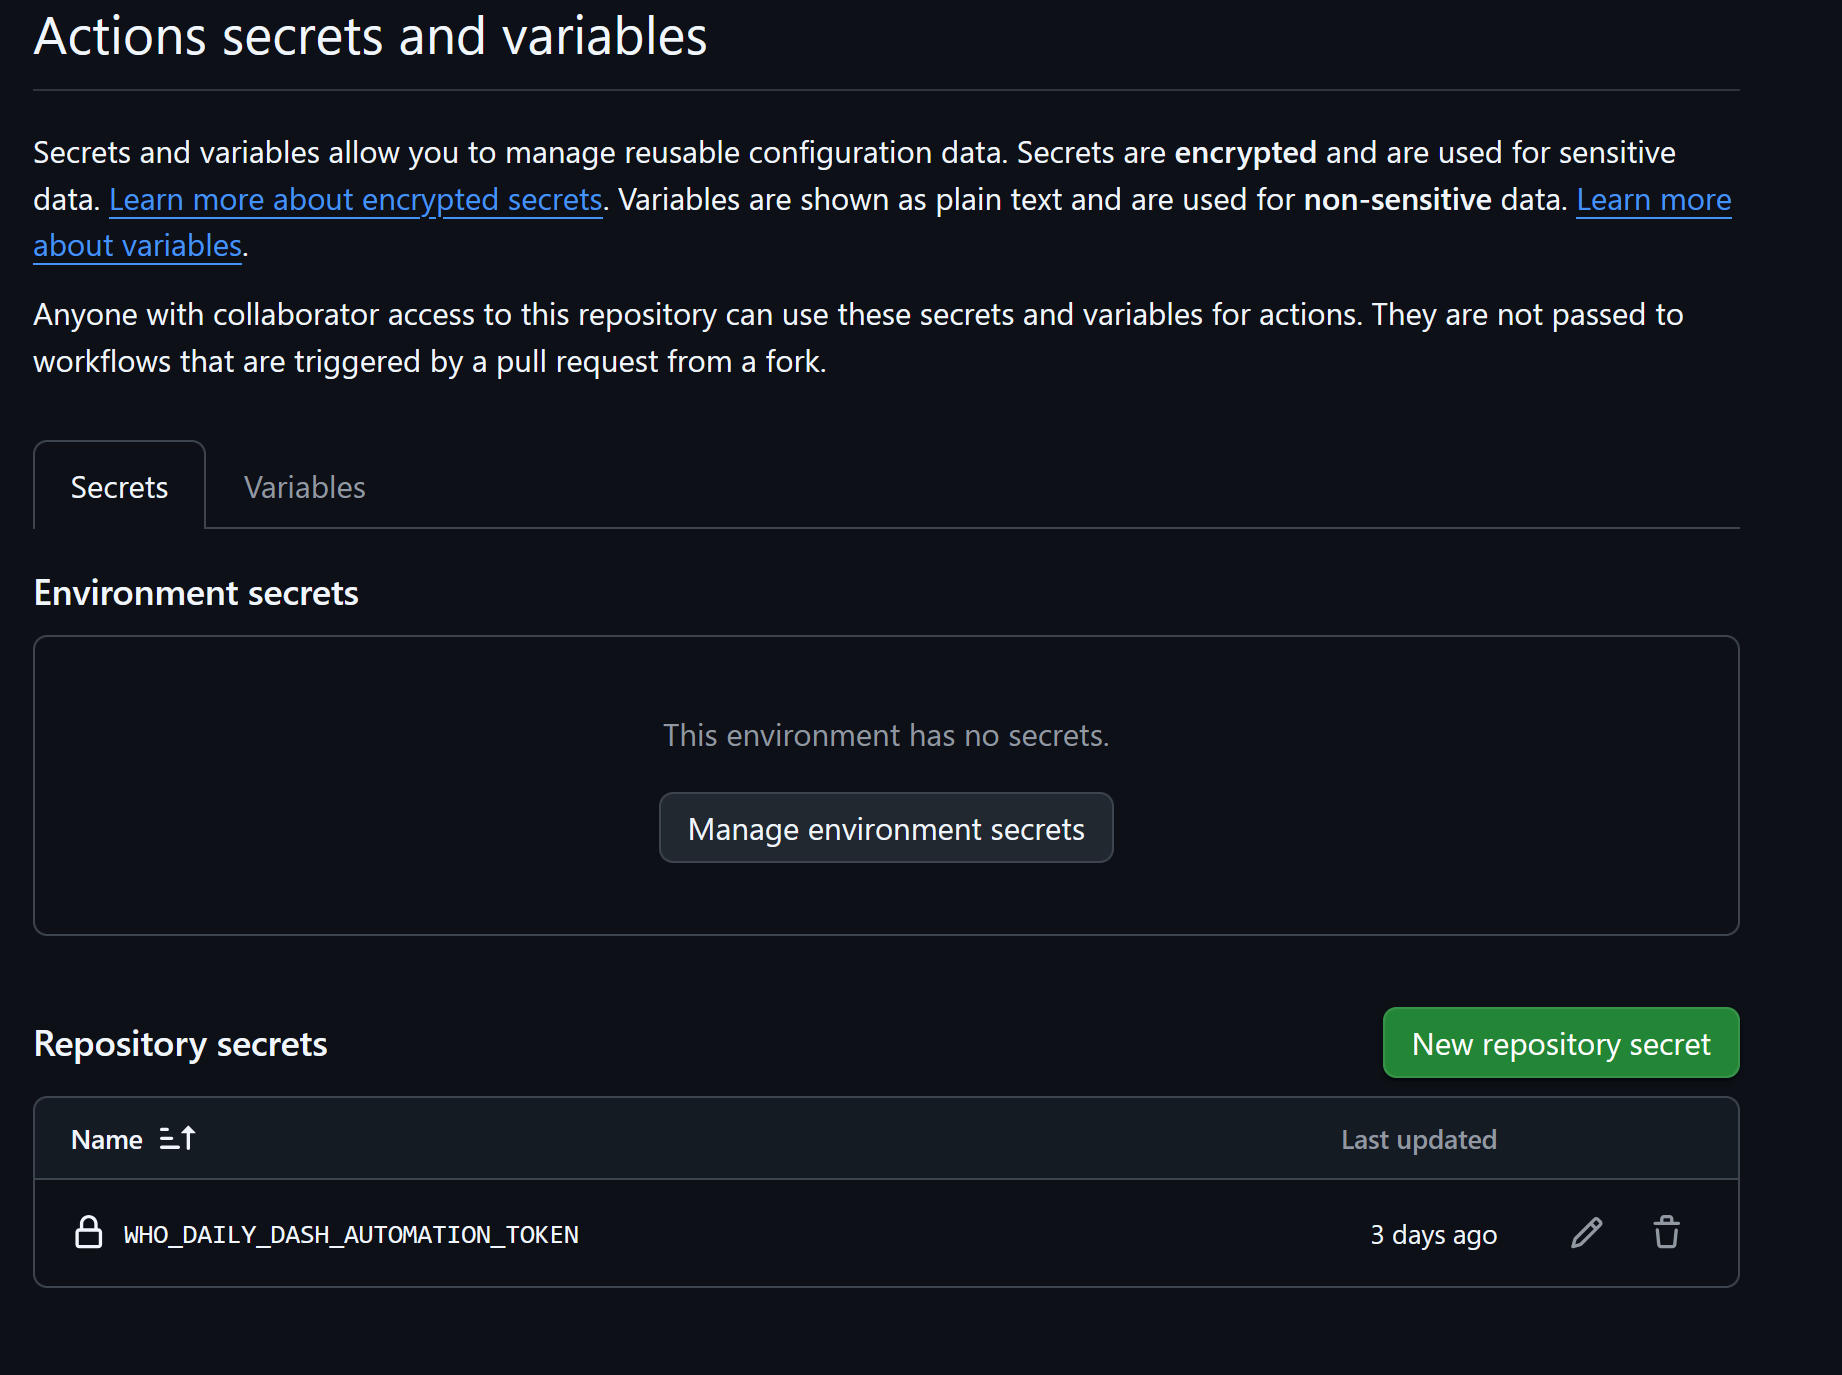
Add a new repository secret, name it and copy the personal access token created earlier. The token is now available for your YAML script.
3. Create the YAML file
Create a New Folder in your local repository.
.github.Create a Subfolder: Inside the
.githubfolder, create another folder namedworkflows.Store YAML Files: Place all your YAML files inside the
workflowsfolder.Create a text file in RStudio — rename to <yourname>.yml. Adding the .yml extension changes it to a YAML file.
Next is the YAML script.
Create the name, give permissions to write (this is needed to upload the data to GitHub), and set a schedule. There are different options for setting a schedule; a good place to get an overview is on GitHub.
name: Fetch sample data from WHO daily

permissions:
  contents: write

on:
  schedule:
    - cron: '0 0 * * *'  # Runs daily at midnight UTC
  workflow_dispatch:  # Allows manual triggering from GitHub
Set up the environment, install system dependencies, set up R, install dependencies, and create the folder for storing data on GitHub. The dependencies are related to the libraries you use in your R script. Check that the .gitignore file doesn’t block files or folders from being pushed to GitHub.
jobs:
  fetch_data:
    runs-on: ubuntu-latest

    steps:
    - name: Checkout repository
      uses: actions/checkout@v2

    - name: Install system dependencies
      run: |
        sudo apt-get update
        sudo apt-get install -y libcurl4-openssl-dev libx11-dev

    - name: Set up R
      uses: r-lib/actions/setup-r@v2
      with:
        r-version: '4.4.3'  # Specify the R version you need

    - name: Install dependencies
      run: |
        R -e "install.packages(c('dplyr', 'readr', 'httr', 'jsonlite', 'purrr', 'janitor', 'glue', 'tidyr'))"

    - name: Create Dataout directory
      run: mkdir -p Dataout
Next, run your R script. Check that you are pointing to the folder where your script is.
- name: Run R script
      run: Rscript Scripts/fetch_who_indicator.R  # Run the script from the Scripts directory
Finally, push your data to your repository on GitHub. You use the personal access token created earlier and need write permissions (stated at the start of your YAML file). Because you have the personal access token, you don’t need to add your GitHub credentials.
- name: Commit data to repository
      env:
        WHO_DAILY_DASH_AUTOMATION_TOKEN: ${{ secrets.WHO_DAILY_DASH_AUTOMATION_TOKEN }}
      run: |
        git config --global user.email "you@example.com"
        git config --global user.name "Your Name"
        git add Dataout/*.csv
        git commit -m "Update WHO data"
        git push https://${{ secrets.WHO_DAILY_DASH_AUTOMATION_TOKEN }}@github.com/${{ github.repository }}.git HEAD:main
Push your YML and R script files to your repository on GitHub.
4. Test your Code
Go to your repository -> Actions (yellow). Any YML files you pushed to your repository will be visible (pink).
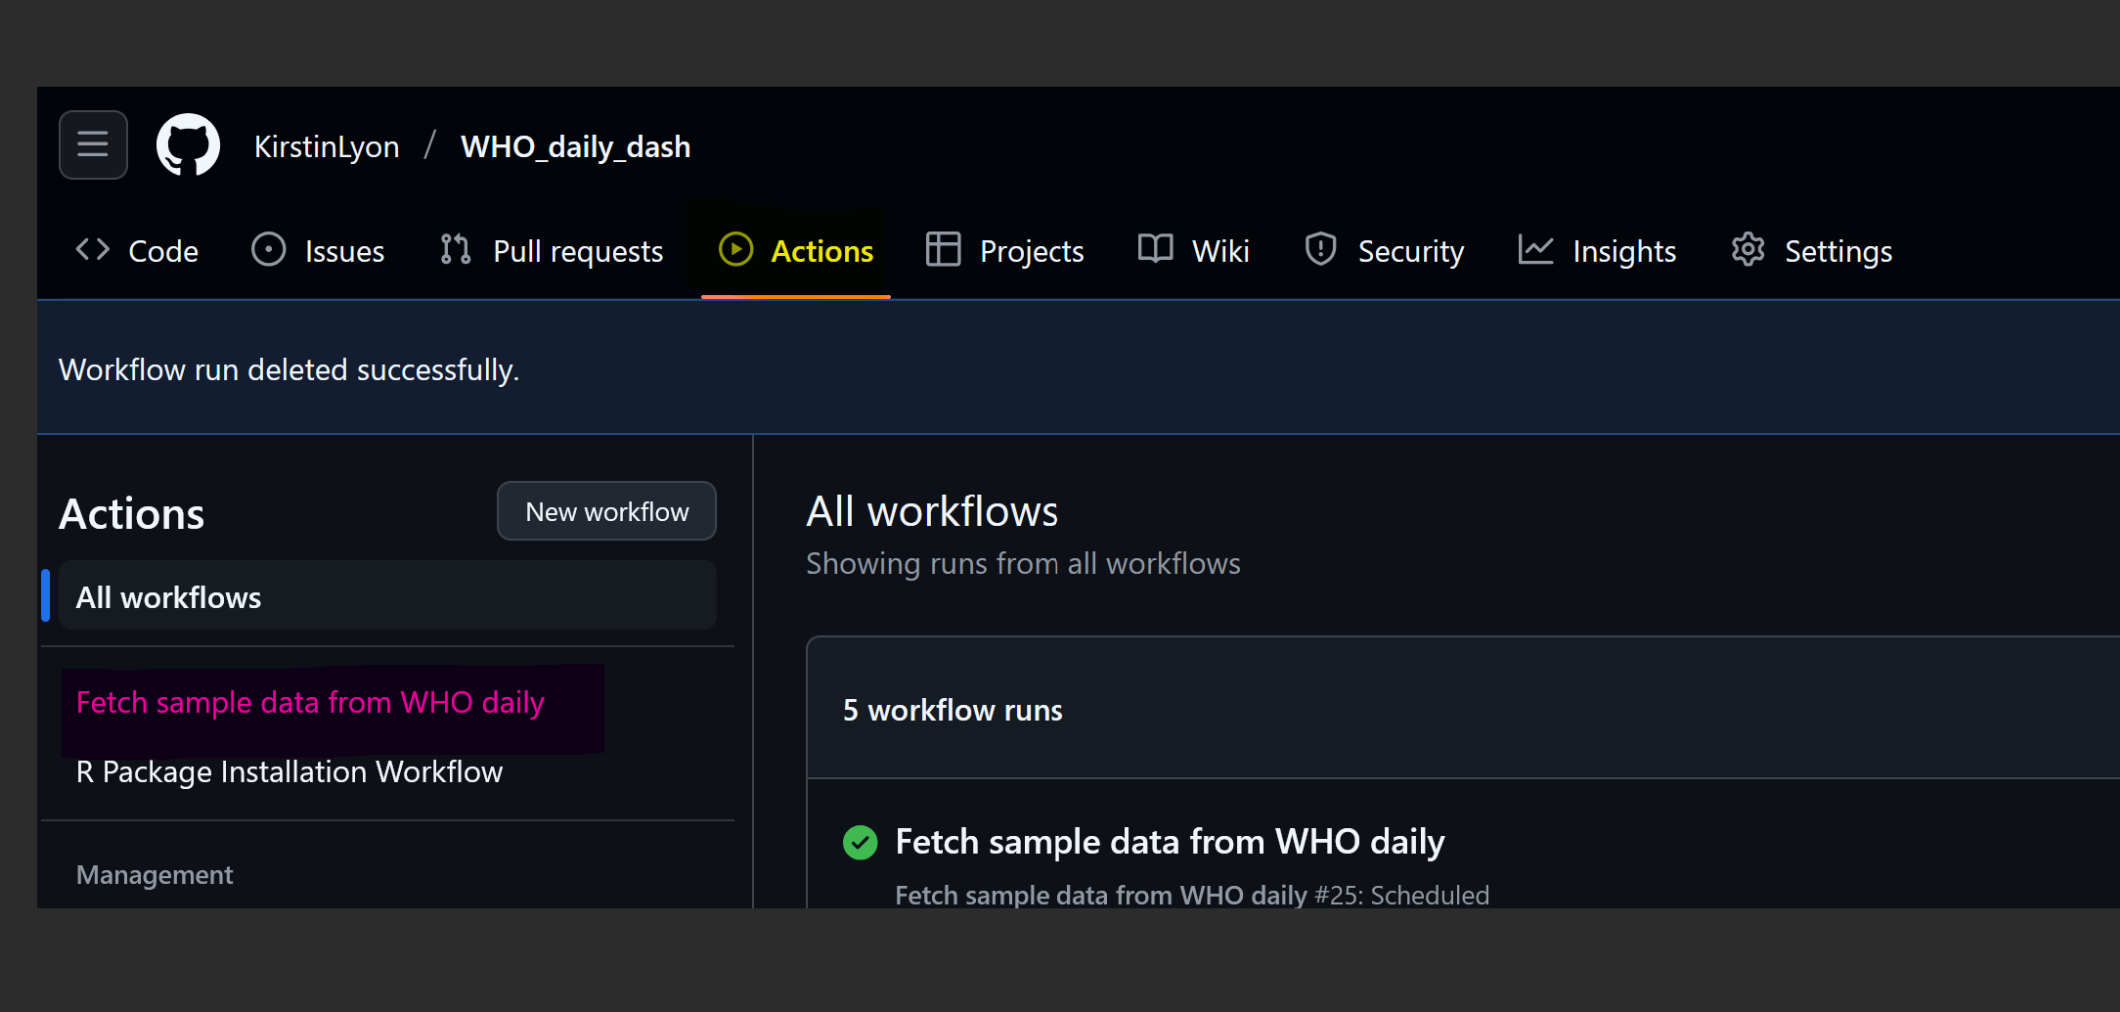
You can run tests anytime with a manual trigger in your YAML file. Select the file (yellow), run workflow (blue and then pink).

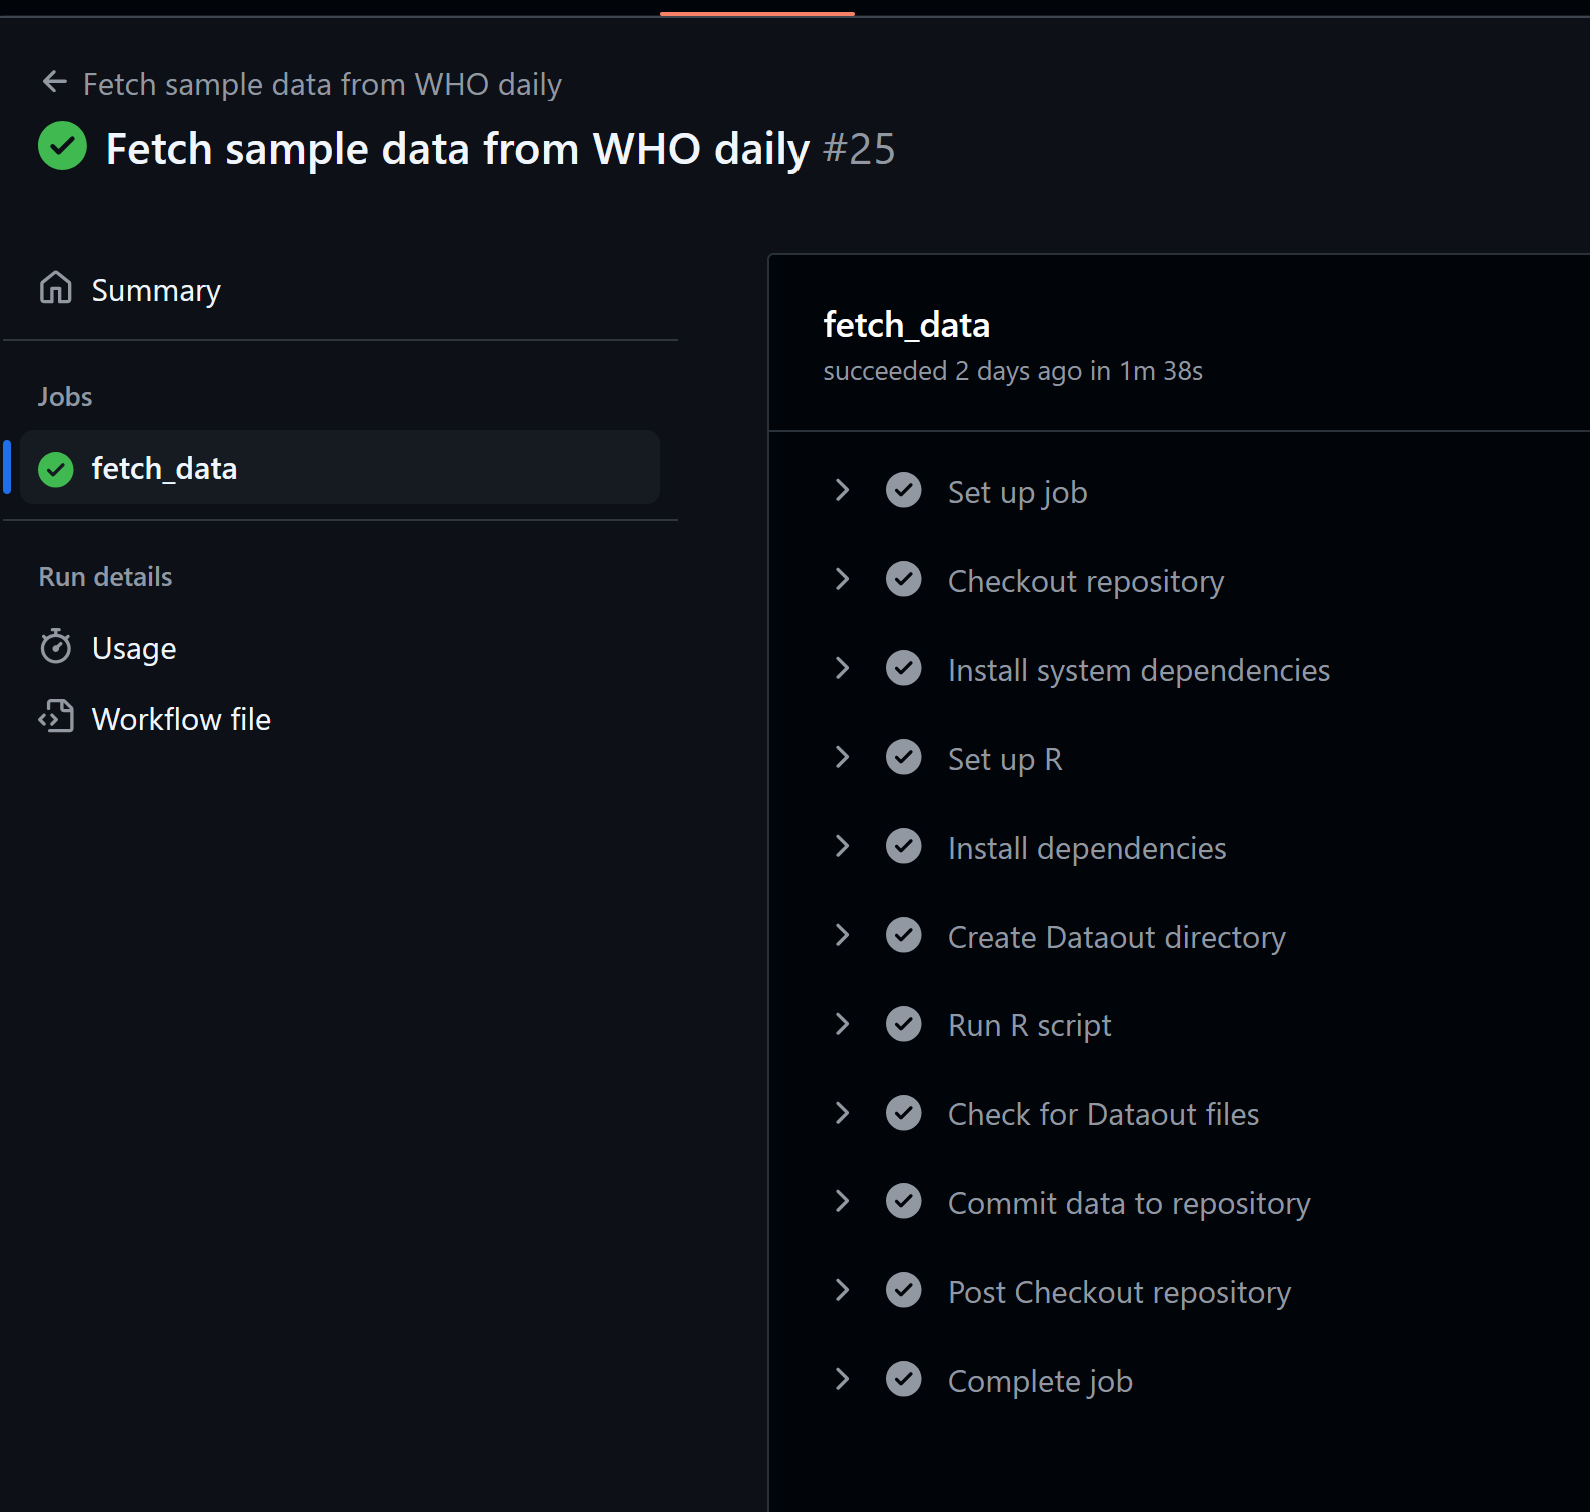
If your run is successful, you’ll see:
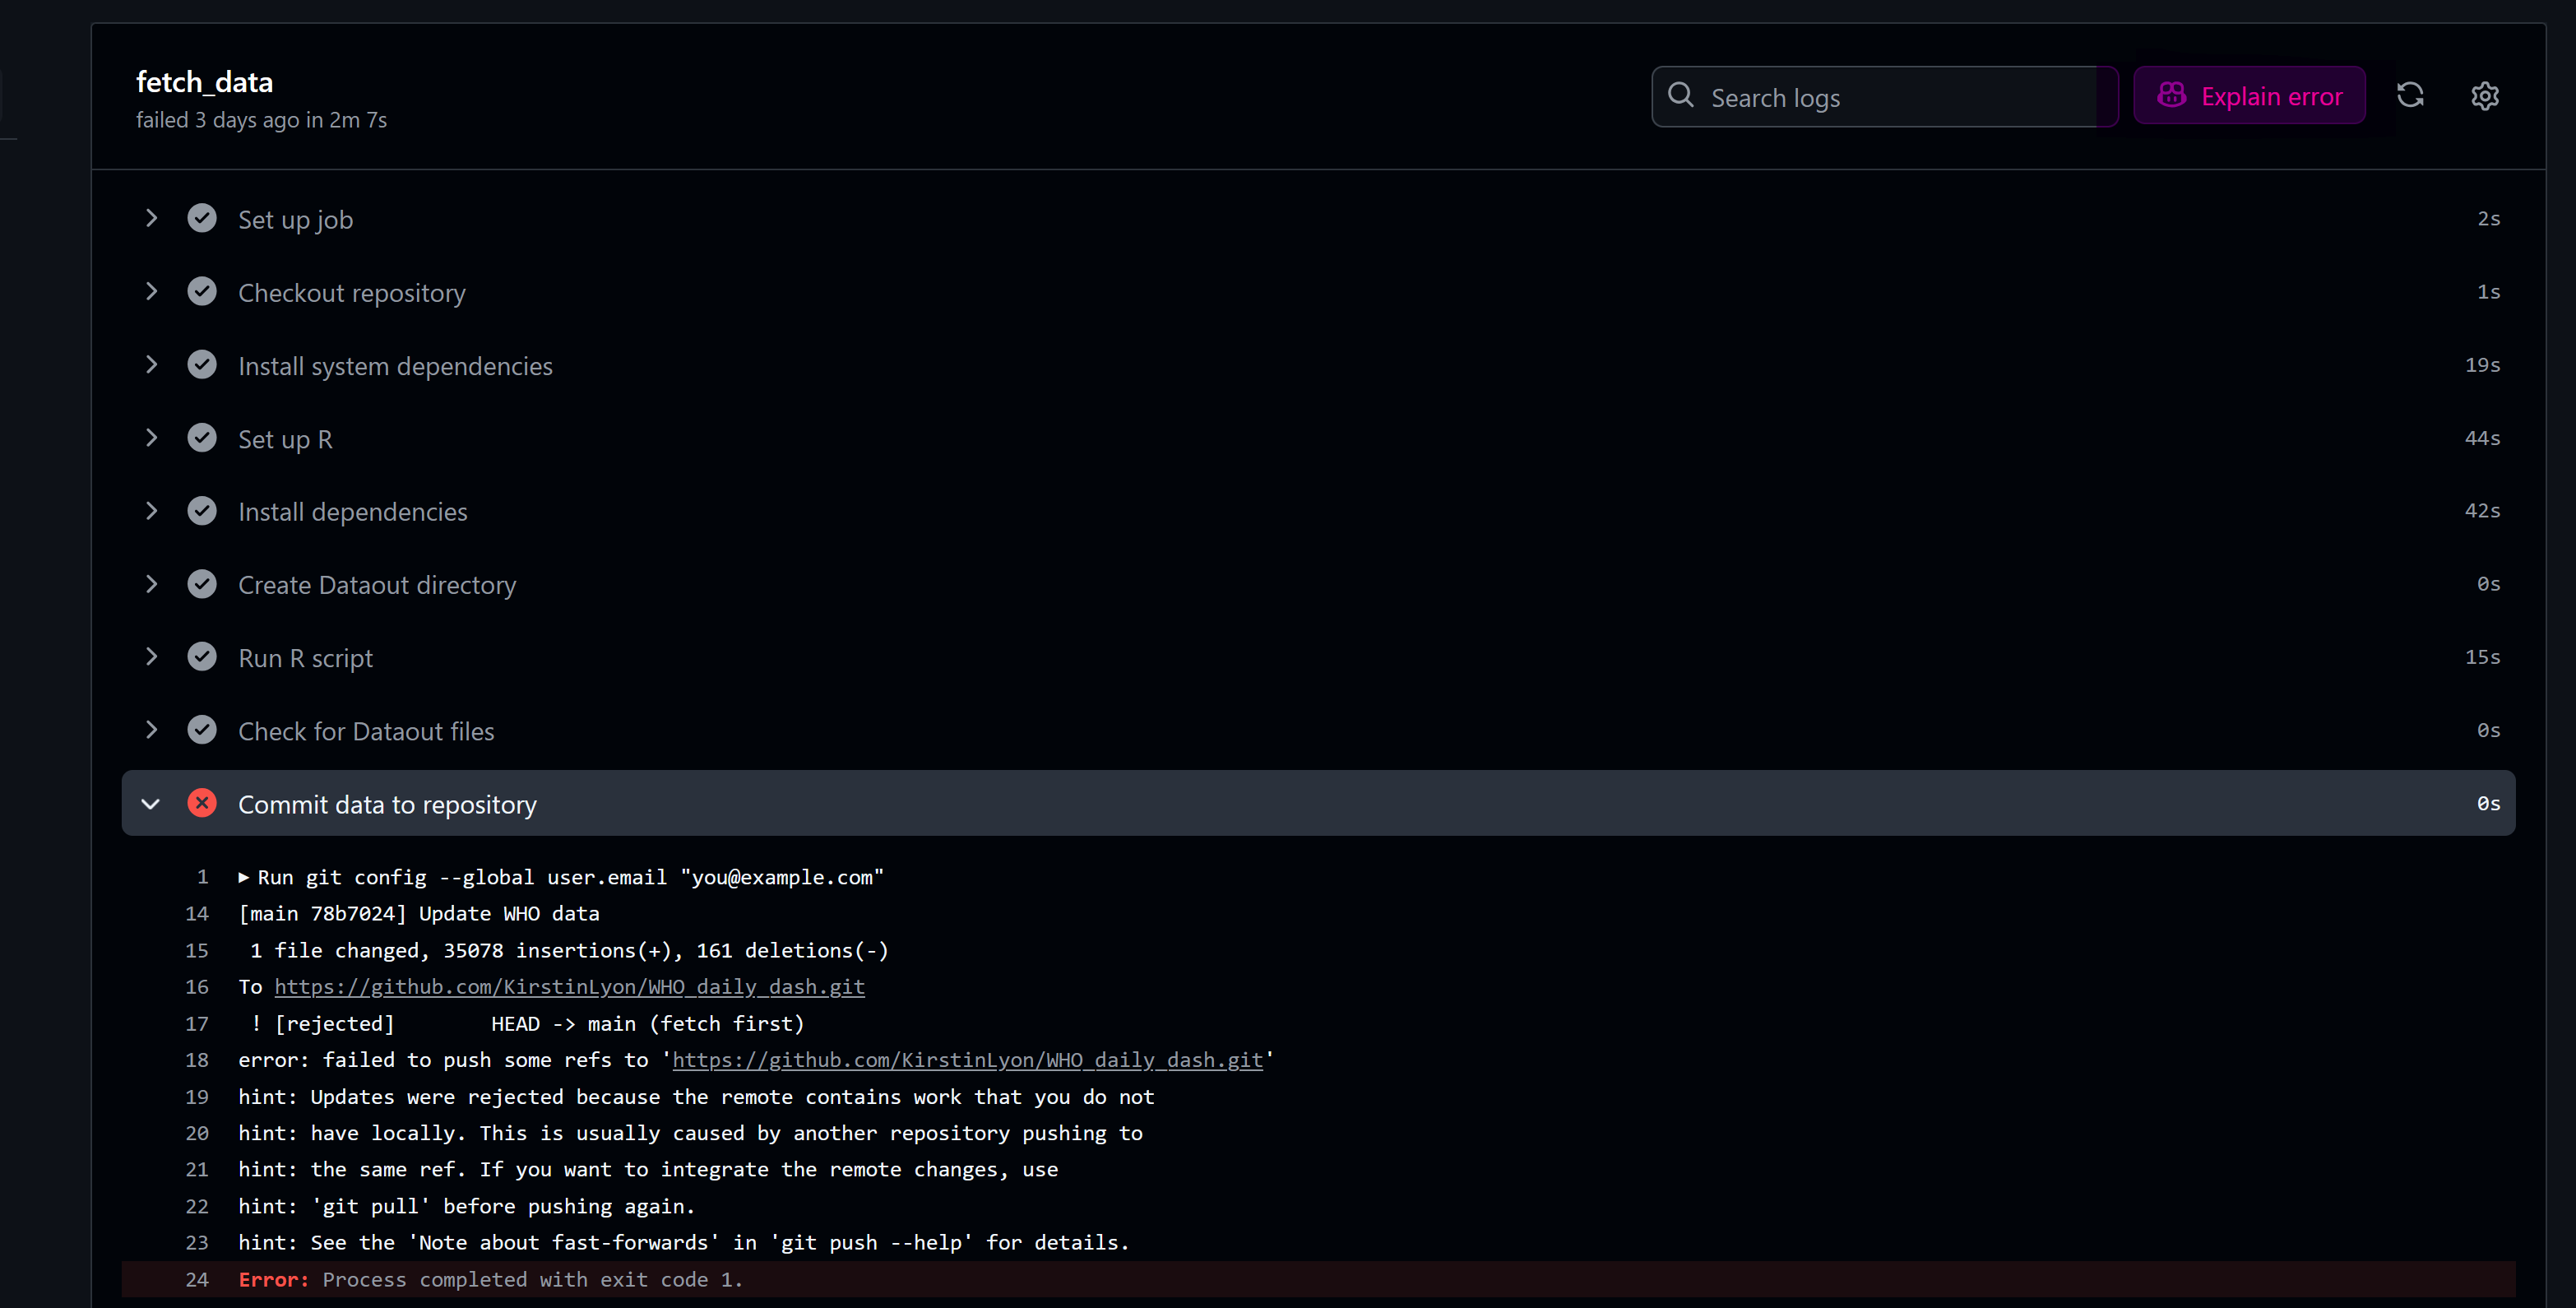
Sometimes, the YAML file doesn’t work. One hint to help with debugging is using GitHub Copilot (highlighted below in pink).
GitHub Actions are incredibly useful for automating workflows. The example above serves as a proof of concept, demonstrating how to streamline your processes.
Links
happygitwithr: Getting started with Git and GitHub in R
Automating R Scripts: Using Task Scheduler with Batch Files (post, code)